Reach out and catch shells with SSH port forwarding
This is a very simple trick for catching shells locally on a device which doesn’t have a public IP, such as a laptop sitting behind a NATted Wi-Fi network.
About a year ago I purchased a Hak5 Bash Bunny, and started using it for basic security demonstrations at work and university. For my demonstrations I wanted something a little more realistic than a VM with internal guest networking, including potentially injecting Powershell Empire payloads into arbitrary systems (with their owner’s permission, obviously).
I wanted my demonstration payloads to dial out through the local gateway to a public IP address just like a real payload would, but still be able to catch the connections (shells) on my laptop. The problem was that I was likely to be performing these demos from a university or corporate Wi-Fi network, and I couldn’t exactly ask someone to set up a port-forward for me so that I could catch a shell through their WAN connection.
Even if I could, my payloads needed to be pre-generated with a domain name or static IP for their reverse shell connection, and I didn’t want to have to re-generate them every time I did a demo on a new network.
C2 infrastructure: remote vs local
The typical way to solve this problem is to set up a command & control (C2) server on the public internet to catch the incoming payload connections, and embed the domain or IP of this server into your payload. You can then remotely connect to the C2 server to interact with the shells after they’ve been caught. In this case all of the interaction with the payload is occurring from the C2 server itself, which has the significant advantage that you can catch shells 24/7 without needing your laptop running.
In my case I wanted to be able to catch shells directly on my laptop, and perform all of the interaction locally. This was partly for convenience—I only wanted to maintain one set of tools, and I wanted those tools on my local machine—and partly so I could more easily demonstrate techniques like the STTY trick to upgrade a limited shell to a full TTY.
(Side note: the first time I saw the STTY trick was on @ropnop’s blog, and it absolutely blew my mind. I wish I’d known about it during my OSCP. I’d highly recommend reading his post if you’re not familiar with the trick.)
In order to solve this problem, I still needed a server to receive the initial connections, but it only needed to be a simple proxy which could forward TCP connections from my payloads when they executed. However, instead of passing the connections to another IP (which would just have the same NATted network problem), my proxy would forward TCP connections over an SSH tunnel using SSH remote port-forwarding, where they would wind up on my laptop’s loopback interface.
The end result is that I could simply SSH into my proxy server to catch the shells from anywhere with an internet connection, and my payloads could always point to the same infrastructure.
The full connection looks like this:
- Payload executes on the victim system, sending a reverse shell over TCP to the C2 proxy server:
victim -> c2.proxy.com:443
- The proxy server receives the TCP connection on port 443 and forwards it over the SSH tunnel:
victim -> c2.proxy.com:443 -> SSH tunnel
- Through the magic of SSH port-forwarding, the connection lands on my laptop’s loopback interface:
victim -> c2.proxy.com:443 -> SSH tunnel -> localhost(laptop):443
The result is that I can generate payloads with an embedded domain name pointing at my publicly-accessible proxy server, but still catch the shells locally as if they were hitting my laptop directly.
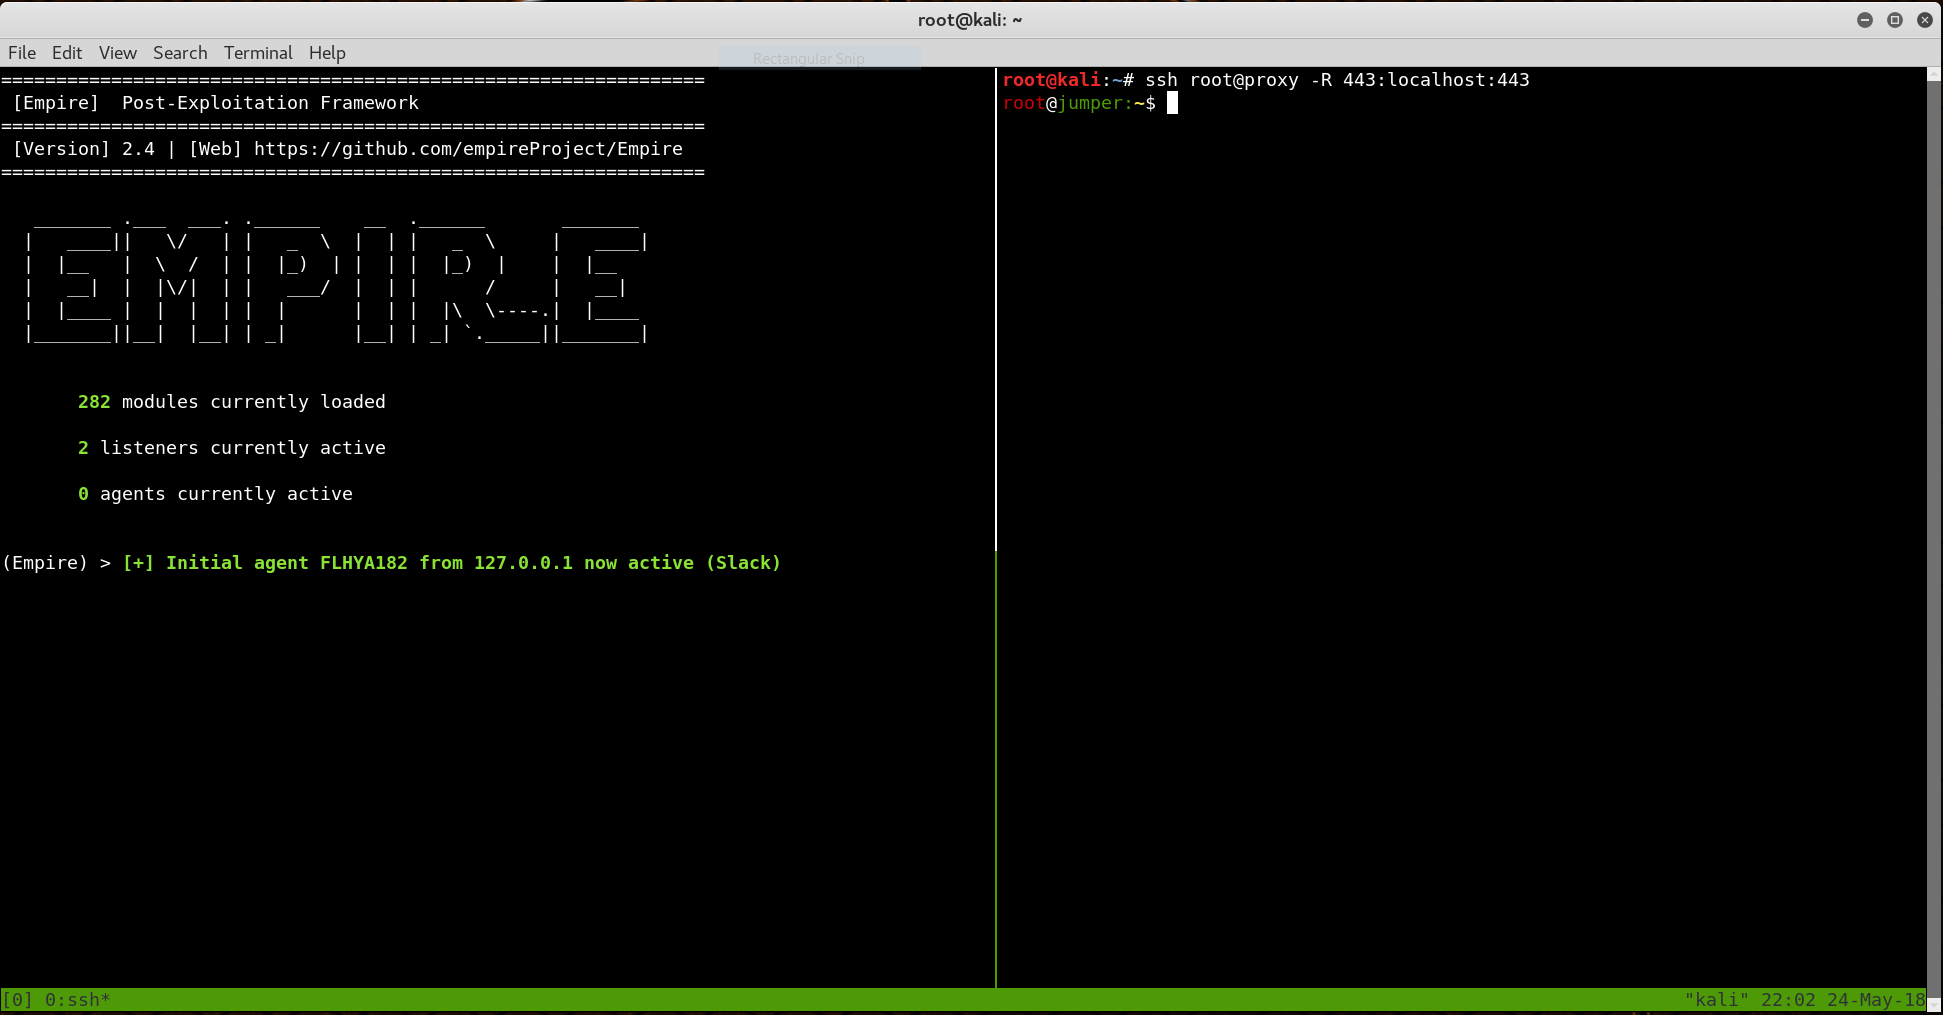
If it sounds complicated, it’s not. The whole thing can be done in a single line:
# Connect to proxy server and catch connections to port 443
ssh root@proxy -R 443:localhost:443
The nice part of this technique is that the server is just acting as a dumb pipe, so it can be lightweight and virtually configuration-free. If I ever need a new one, it’s trivial to spin up a cheap VM and make the minor configuration changes needed. (There are also some good opsec reasons why you might prefer not to keep any of your tools or other configuration on your C2 server, but these weren’t my priority.)
The proxy server
Both of the techniques below require an additional server with a public IP and the ability to perform SSH remote port forwarding. My proxy server is an Ubuntu 18.04 machine, which didn’t require any additional configuration other than what is described below.
Method 1: Native SSH remote port forwarding
The easiest method is to use the native SSH remote port forwarding functionality, which only needs two things:
- Server-side: The
GatewayPortsoption set to “Yes” in the server’ssshd_configfile - Client-side: The
-Rflag with the desired port to be forwarded
Once the server has been configured, the client command looks like this:
ssh root@proxy -R 443:localhost:443
This will open an SSH connection to the proxy as the root user, open port 443 on the proxy’s external interface, and forward any connections to localhost:443.
There is one catch with this method, which is that sshd will refuse to bind to ports below 1024 unless you connect over SSH as the root user. This isn’t a security issue if you’re using public key authentication, but it might be undesirable if you’re paranoid and prefer to prohibit connections as root.
The socat method below avoids this problem, because you can elevate privileges with sudo when executing the command. Even so, using pure SSH with GatewayPorts enabled is a much neater solution, and doesn’t require installation of any additional packages.
Method 2: SSH and socat
Another method requires socat to be installed on the proxy. This method works without directly logging in as root, but you’ll still need to run socat with root permissions on the server. The easiest way to do this is by using a passwordless sudoer and authenticating with an RSA key.
The script I use is called ssh-socat.sh, which is slightly more complicated because it sets up port-forwarding for five ports in total: 80, 443, 8080, 8443, and 1194.
#!/bin/bash
# Connect to proxy server and catch connections to multiple ports
ssh -t user@proxy \
  -R 40080:localhost:80 \
  -R 40443:localhost:443 \
  -R 48080:localhost:8080 \
  -R 48443:localhost:8443 \
  -R 41194:localhost:1194 \
"
  echo 'Forwarding ports, Ctrl+C to exit'
  sudo socat TCP-LISTEN:80,fork TCP:localhost:40080 &
  sudo socat TCP-LISTEN:443,fork TCP:localhost:40443 &
  sudo socat TCP-LISTEN:8080,fork TCP:localhost:48080 &
  sudo socat TCP-LISTEN:8443,fork TCP:localhost:48443 &
  sudo socat TCP-LISTEN:1194,fork TCP:localhost:41194
"
Usually I’ll run this script in a separate terminal window when I’m expecting the shells to appear. Hitting Ctrl+C will kill the socat processes (closing the 5 open ports on the proxy), and close the SSH session.
Note that if you’re going to use this method (first forwarding connections to localhost on the proxy, and then over the tunnel) the actual port-forwarding bit isn’t complicated, and there are a number of other methods you could use, including rinetd, iptables, and even netcat.
Conclusion
This is a useful trick if you need to catch shells on a local machine behind NAT or a firewall making a direct connection difficult. It’s fairly foolproof, and requires hardly any configuration.
The biggest drawback is that you can only catch your shells as long as the SSH connection is up, so closing your laptop means orphaned shells. If this is a problem, you’ll be better off with a dedicated C2 server and catching your shells there instead.